
Tags – Photography lessons. Tutorials.
Even though photography is an ART, besides knowing your DSLR camera (and, sometimes, besides knowing your compact one, or, even, your smartphone) you might need some technical know-how. This tutorial has no aim other than to help the beginners. For deeper learning, please consult the Internet.
LESSON 6: EDITING PHOTOS IMAGE FORMATS
Before talking about editing photos, we must talk about the image formats. Roughly, there are two types of format: RAW and JPEG. Nowadays, almost all digital cameras -including compact ones- can provide RAW and JPEG formats. Normally, when you take a photo with an SLR camera, you can choose the format.
RAW format
RAW format is an uncompressed file which contains undeveloped or unprocessed data stored by the image sensor (CCD). This means that to obtain a final image you need to edit it. RAW format is mainly used by professionals and by advanced photographers who need or wish to obtain the best results from their pictures by using all the information captured by the CCD. The sharpness and the contrast on a final RAW picture should be much more enhanced than on a JPEG picture, but it requires some time and a minimum of knowledge to obtain it.
We must know that RAW files can’t be open with every operative system or every computer. In case you decide to use RAW, you must find first if you can edit it on your computer. Something you must know too is that RAW files need much more memory from your card than JPEG files. This means that if you can take, for instance, a couple of thousands of shots on JPEG with your card memory, you will only be able to take a few hundred on RAW.
JPEG format
The JPEG format is an already developed picture that normally doesn’t need to be edited if you selected the correct settings on your camera and if your composition is correct. JPEG files are easy to use, convenient and instantaneous. Normally, a JPEG file shouldn’t need to be edited. Therefore, I highly recommend the beginners to use JPEG.
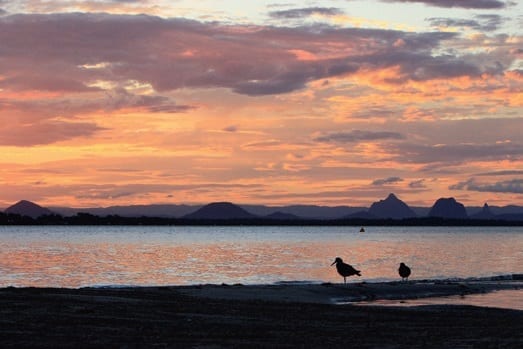
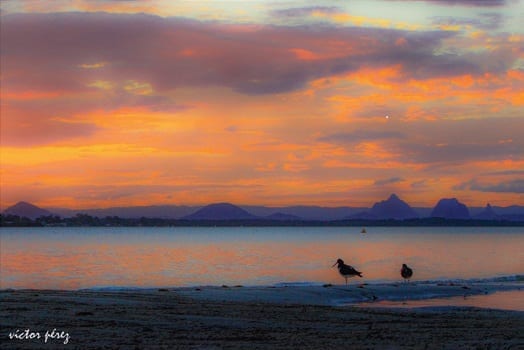
The editing gives, in this case, a soft pastel look to the picture. The original is unsigned while the edited photo is with the signature.
GRAPHICS EDITORS
Graphics editors are computer programs which allow us to edit our digital photos. The most popular -and complete- are Photoshop and Lightroom but there are some others often provided freely by Microsoft or other software companies. Generally, graphics editors supply many digital tools to achieve RAW pictures or to improve the JPEG ones. If you have the skills, from a simple photo you can do a real work of art, with the only limit being your good taste… One of the most delicate points of a photo being the right balance of the colours, you must be sure that the White Balance (WB) is perfect.
If you didn’t set it correctly on your camera, you can correct it during the editing, even on a JPEG file. The brightest point of the picture will become then white and the darkest, black. With a graphics editor you can modify or correct several parameters of your picture as, for example, the brightness or the darkness, you can enhance or soften the colours, you can convert a colour photo in a BW picture, you can trim the frame, you can straighten a falling horizon, or you can even superimpose several pictures to make a photomontage (further to this point, in my opinion, you shouldn’t trick the people by not saying that your picture is a photomontage…).
Therefore, editing can be an important step in photography: it’s the final step before you show or print your picture.
SOME OTHER TIPS
Read the user manual of your camera. Always use the largest file (picture) your camera allows you to. Suppress the date and hour from the file (you always have it in its data). Besides shooting on full manual, accordingly to the circumstances you can shoot on Tv (shutter priority) or on Av (aperture priority). Tv is convenient, for instance, for sports events and wildlife running or flying: you choose the speed and the camera decides the aperture. Av is recommended for quiet scenes like, for instance, people walking and town or landscapes: you chose the aperture and the camera decides the shutter speed. This is the final Photography Tutorial in the series. If you would like to contact Victor directly please email him at [email protected].